Advanced Features
Drag
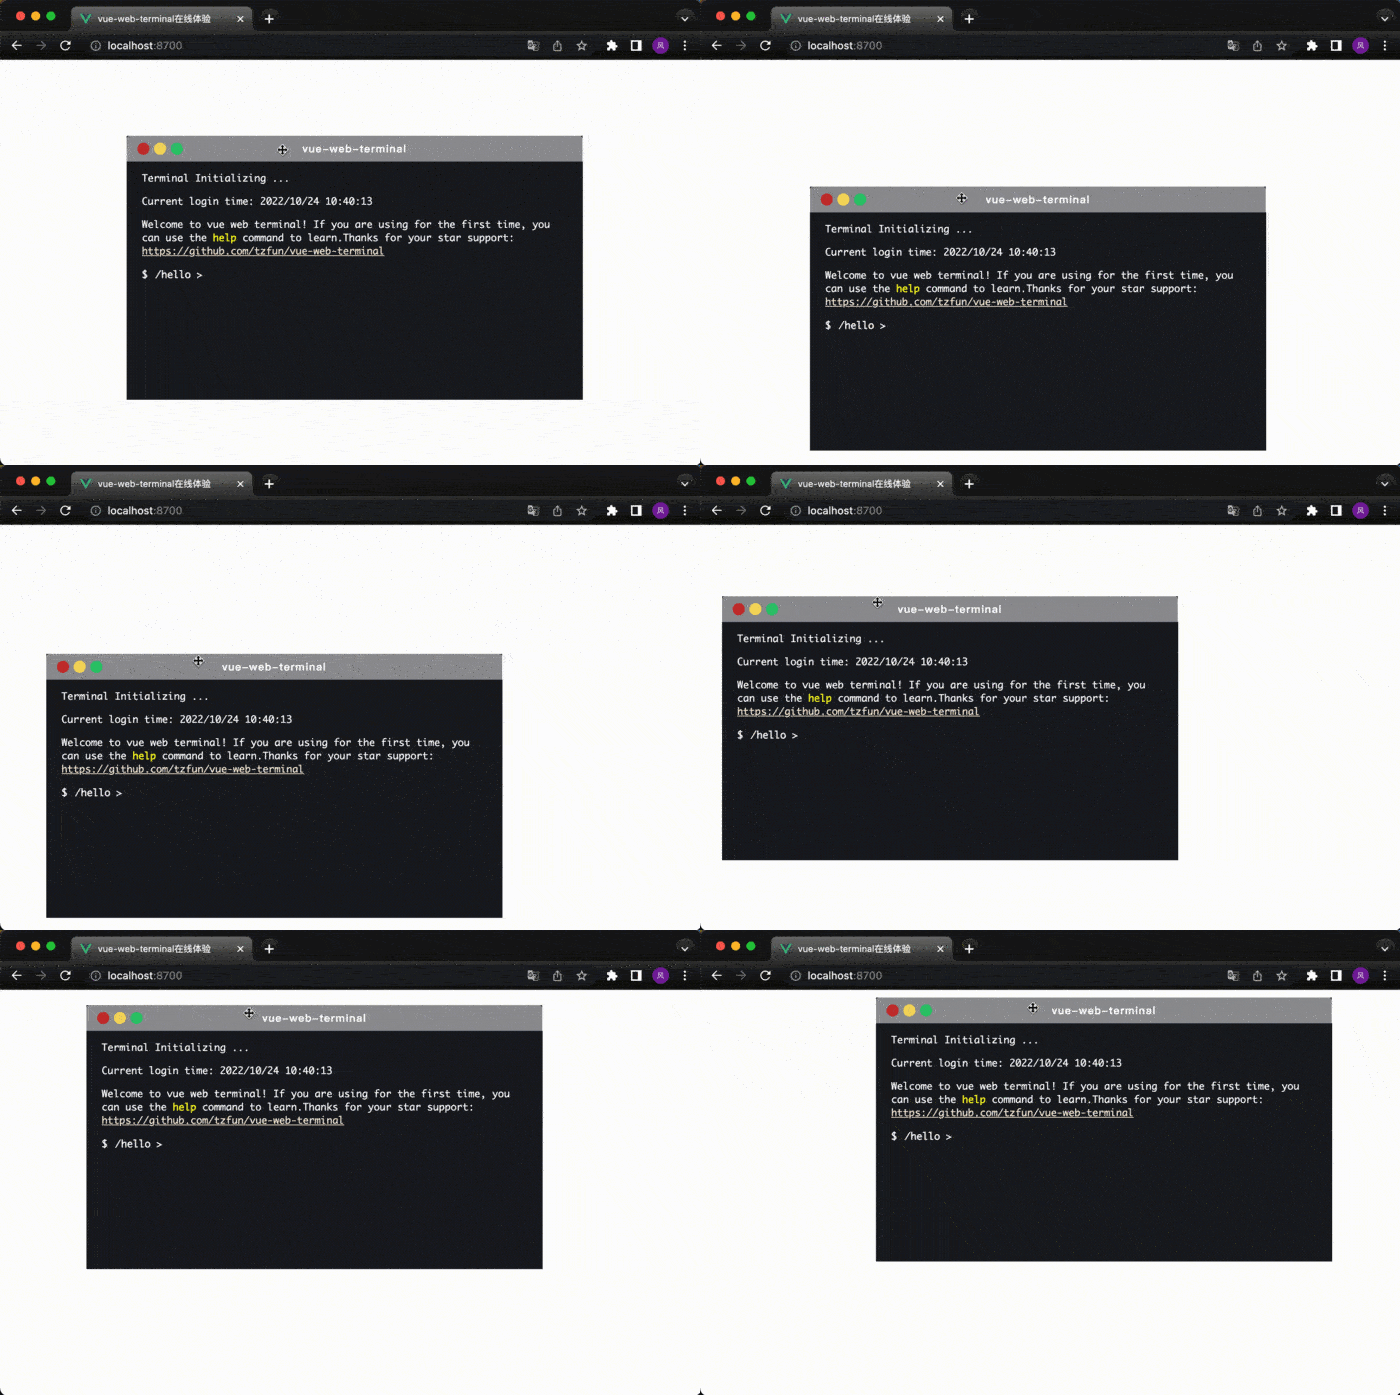
The plugin provides a drag-and-drop function. When it is turned on, the Terminal window will be a fixed positioned container. Its dragging range is within the entire browser window. It also provides the function of window resizing and fixing. The resizing touch area is at the four corners of the window.
To enable the drag function, you need to set show-header to true and configure drag-conf. You can configure the initial window size through the width and height of DragConfig , and control the initial window position through init. The following is a simple example.
<terminal name="my-terminal"
          show-header
          :drag-conf="{width: 700, height: 500, init:{ x: 50, y: 50 }, pinned: false}">
</terminal>
The configuration of DragConfig is as follows:
| Prop | Description | type |
|---|---|---|
| width | The width of the drag window, which can be a number (in px) or a percentage (relative to the browser window). | number/string |
| height | Drag window height, which can be a number (in px) or a percentage (relative to the browser window). | number/string |
| zIndex | Window level, this value can be modified and monitored by the terminal, which can be used for multi-window level control, default 100. | number |
| init | Window initialization position, if not filled, the default position is in the center of the browser window, where x and y are in px. | Position |
| pinned | Pinned window, once pinned, it cannot be dragged, and the pin will be triggered in the on-click event when the button is clicked to modify this value. | boolean |
In addition to mouse control, you can also use the dragging API to move the window position

Real-time Echo
The default message of terminal is displayed in append mode. When you only need to display the execution process and do not want these contents to exist in the record after the execution, real-time echo is a good choice. For example, when gradle or npm downloads the dependency package, the download progress bar animation is displayed.
In the exec-cmd event callback, the success callback function supports passing in the real-time echo processing object TerminalFlash.
Create a flash object through new TerminalFlash() and pass it into the success callback. The flash object provides two methods:
flush(string): Update the currently displayed contentfinish(): End execution
import {FailedFunc, SuccessFunc, TerminalFlash} from 'vue-web-terminal'

const onExecCmd = (key: string, command: string, success: SuccessFunc, failed: FailedFunc) => {

  let flash = new TerminalFlash()
  success(flash)

  let count = 0
  let flashInterval = setInterval(() => {
    flash.flush(`This is flash content: ${count}`)

    if (++count >= 20) {
      clearInterval(flashInterval)
      flash.finish()
    }
  }, 200)

}
Ask for input
When you need to ask the user, use this function to obtain the user input content, such as when the user needs to enter the username and password when logging in.
In the exec-cmd event callback, the success callback function supports passing in the processing object TerminalAsk of the user input.
Create an ask object through new TerminalAsk() and pass it into the success callback. The ask object provides two methods:
ask(options): Initiate a user query input, options is an object, and its properties are explained as follows:question: string, the question asked, or a prefix string that can be understood as user input.callback: function, callback when the user types enter, the parameter value is the content entered by the user.autoReview: boolean, whether to automatically append the current display content when the user presses Enter.isPassword: boolean, whether it is a password input.
finish(): End execution
import {FailedFunc, SuccessFunc, TerminalAsk} from 'vue-web-terminal'

const onExecCmd = (key: string, command: string, success: SuccessFunc, failed: FailedFunc) => {
    let asker = new TerminalAsk()
    success(asker)

    asker.ask({
        question: 'Please input github username: ',
        autoReview: true,
        callback: value => {
            console.log(value)
            asker.ask({
                question: 'Please input github password: ',
                autoReview: true,
                isPassword: true,
                callback: () => {
                    //    do something
                    asker.finish()
                }
            })
        }
    })
}
Text Editor
Usage
When you need to edit text in Terminal, you can consider using the built-in text editor, which requires the use of two APIs: textEditorOpen, textEditorClose
A simple example:
const onExecCmd = (key: string, command: string, success: SuccessFunc, failed: FailedFunc) => {
    TerminalApi.textEditorOpen('my-terminal', {
        content: 'Please edit this file',
        onClose: (value, options) => {
            console.log("User editing is complete, text result:", value, "options:", options)
        }
    })
}

const closeEditor = () => {
    TerminalApi.textEditorClose('my-terminal', { fromUser: false })
}
Slot custom style
If you don't like the default style, you can use Slot to customize the editor style, such as changing to an editor with highlighting function such as Codemirror or VS Code. The slot data has three properties that you need to care about:
value: The edited text content, you need to bind it withv-modelin your implemented editor.onFocus: To get the focus event, you need to bind the@focusevent in your editor.onBlur: Lost focus event, you need to bind the@blurevent in your editor.
Custom shortcut keys
The plugin provides an onKeydown event, which is the best way to control the Terminal shortcut keys in the active state. Here, take the text editor as an example, and set the user to press the shortcut key Ctrl + S to complete the editing and save.
<script setup lang="ts">
  import {SuccessFunc, FailedFunc, TerminalApi} from "vue-web-terminal";
  import {ref} from "vue";

  const name = ref<string>("my-terminal")
  const enableTextEditor = ref<boolean>(false)
  const onExecCmd = (key: string, command: string, success: SuccessFunc, failed: FailedFunc) => {
    if (key === 'edit') {
      TerminalApi.textEditorOpen(name.value, {
        content: 'Please edit this file',
        onClose: (value) => {
          enableTextEditor.value = false
          success({
            type: "code",
            content: value
          })
        }
      })
      enableTextEditor.value = true
    }
  }

  const onKeydown = (event: Event) => {
    if (enableTextEditor.value && event.key === 's' && event.ctrlKey) {
      _textEditorClose(true)
      event.preventDefault()
    }
  }

  const _textEditorClose = (option: boolean) => {
    TerminalApi.textEditorClose(name.value, option)
  }
</script>

<template>
  <terminal :name="name" @exec-cmd="onExecCmd" @on-keydown="onKeydown">
    <template #textEditor="{ data }">
      <textarea name="editor"
                class="t-text-editor"
                v-model="data.value"
                @focus="data.onFocus"
                @blur="data.onBlur"></textarea>

      <div class="t-text-editor-floor" align="center">
        <button class="t-text-editor-floor-btn" @click="_textEditorClose(false)">Cancel</button>
        <button class="t-text-editor-floor-btn" @click="_textEditorClose(true)">Save & Close</button>
      </div>

    </template>
  </terminal>
</template>
